
On average, we visit the bathroom six to eight times daily. That can add up to 2,500 trips, on average, a year. You may not be able to deep clean often, but you want your bathroom to be pristine, don’t you? Or, at the very least, relatively clean. Here’s how to up your bathroom cleaning game with the tips and tricks of professionals.
Skip to section
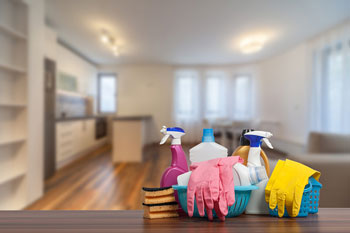
What are The Tools Needed For Bathroom Cleaning?
- A duster
- Brushes for toilets, tubs, and showers
- Scrub pads for sinks and tubs
- Microfiber cloths
- Disinfectant
- All-purpose cleaner
- All-purpose dusting spray
- Toilet bowl cleaner
DIY Eco-Friendly Cleaners
 There is no need to use harsh chemicals when bathroom cleaning. Instead, products like vinegar can act as all-purpose cleaners that cut through the grime and act as disinfectants. The following are some of our favorite recipes for eco-friendly cleaners using ingredients from around the house:
Recipe for DIY Eco-Friendly All–Purpose Cleaner
Ingredients:
- 1 ½ cups of baking soda
- ½ cup of warm water
- ½ cup of liquid soap
- Two tablespoons of white distilled vinegar, or apple cider vinegar
Directions:
- Mix in a spray bottle
- Apply to area needed
Recipe for DIY Eco-Friendly Dusting Spray
Ingredients:
- 1 part water
- 1 part vinegar
Directions:
- Add the water and vinegar to a spray bottle and mix well.
- Apply to dust on any surface.
In What Order Should I Clean My Bathroom?
 When cleaning your bathroom, it is critical to start cleaning from the top down, so that dirt and debris won’t fall onto previously cleaned items. You may need more time than a speed clean, but with this list, you can clean your bathroom like a professional.
- Clear counters
- Dust/sweep
- Apply cleaner to the shower/tub
- Clean the toilet
- Clean the sink
- Scrub shower/tub
- Clean vanity area/counters
- Mop floors
- Empty trash
- Wipe down doorknobs/fixtures
1. Clear All Counters
Before you begin your bathroom cleaning, clear some space from the counters and floors. For example, you will want to take items out of the shower, off the top of the toilet tank and sink, and off the tub’s edges. The goal is to make your toilet cleaning and shower cleaning more accessible, too.
2. Dusting and Sweeping of the Bathroom
To prepare for this part of your bathroom cleaning, start by removing any rugs on the floor. Continue by sweeping any dust and debris on the floor to prepare it for mopping. Use microfiber cloths to avoid pushing dust around, and partner it with your DIY eco-friendly dusting spray.
3. Apply cleaner to the Bathtub and Shower, Allowing them To Soak
 Applying the cleaner to the bathtub and shower and permitting it to sit for a few moments allows it to break down the residue collected on the surface. Give it at least five to seven minutes to have the proper time to work.
4. Toilet Cleaning By The Book
Cleaning your toilet to professional standards requires more than just a perfunctory swish with a toilet brush. But, thanks to Step 1, you have removed everything from around your toilet. Now, flush your toilet with the lid down.
Add your cleaner to the toilet so it has a chance to work, and shut the lid again. Next, use your multi-purpose cleaner and spray the outside of the toilet from the top down, making sure to include every part; the handle, tank, lid, outside of the bowl, all the way down to where the toilet meets the floor.
Using your microfiber cloths, scrub everything, remembering to work from the top down. Once you have finished that, turn your focus to the toilet seat. Clean the top and the bottom of the seat by lifting the lid. Make sure to remember to clean the hinges.
By this time, toilet bowl grime should be easier to remove, and you will be able to use your toilet brush to quickly work all the dirt from under the rim to the hole in the bottom. Time to admire the sparkle! Flush your toilet (it may take a couple of flushes to wash away all the grime and cleaning products), and your toilet cleaning is complete.
5. Time For Sink Cleaning
If you want to clean your sink like the professionals, follow these steps when you’re doing your bathroom cleaning:
Step 1. Fill the sink with a few inches of hot water and add a cup or two of white vinegar.
Step 2. Dip one of your microfiber cloths into the water and wipe down the sides of the sink. Rub the mixture around the faucet. The acidity of the vinegar will easily cut through the soap scum, and because it evaporates quickly, it will leave everything clean and shining.
Step 3. Drain the sink.
Step 4. To disinfect the sink, use a disinfectant spray and thoroughly wet the surface. Allow it to sit for at least 10 minutes before you wipe the solution away.
Step 5. If you find a buildup on the faucet and handles, mix dish soap and water, wipe it on the faucet with a microfiber cloth, and then dry.
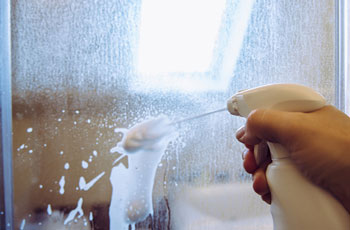
6. Shower and Bath Cleaning
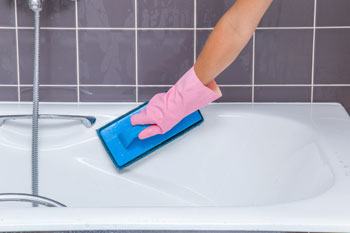 Now that your shower and bath cleaning spray has had time to sit on your shower and tub surface, you will have an easier time wiping the grime away. Take your scrub pad and, using the abrasive side, start scrubbing the tub to get your bath cleaning done. This job may still require some elbow grease. And remember the faucet and handles!
When you get to the shower cleaning portion for the tile cleaning, you will want to use the soft side of the scrub pad or a scrub brush. Ensure it is good and wet, and apply enough pressure to remove soap scum.
After you finish tile, shower, and bath cleaning, you are ready to rinse!
If you have a removable shower head, use that to spray water. If not, fill a bucket and pour it down the shower wall, starting at the highest point. Lastly, utilizing a microfiber cloth, wipe down and polish all chrome surfaces.
Note: All shower glass doors accumulate stains, with water hardness being a significant factor. Shower glass restoration companies can assist in returning them to their natural state. And professional cleaners can assist in maintaining their shine when they come for a monthly, bi-weekly, or weekly cleaning service.
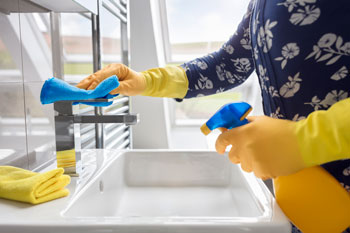
7. Covering Vanity Area and Counters
Now is the time to clean your mirror and wipe down all counters. Once you have covered this aspect of bathroom cleaning and dried everything with a microfiber cloth, you can move all items back into the bathroom that was cleared from the surfaces for the preparation for the cleaning.
8. Mop the Bathroom Floors
 Since an earlier step in your bathroom cleaning had you sweeping your bathroom floor, you won’t have to worry about any dirt or grime getting in the way when you mop your floor. Allow the floor to dry before returning the bathroom rug, trash-can, or other items.
9. Emptying the Trash Can
When you wait for the bathroom floor to dry, empty the trash can. You can also remove empty items in the bathroom, such as empty shampoo containers, soap slivers, or toothpaste containers.
10. Wiping Down Doorknobs and Light Switches
As your last step in your bathroom cleaning, take your DIY all-purpose cleaner and a microfiber cloth and wipe down all doorknobs and light switches to give a final clean. Congrats! Your bathroom is sparkling!
You love the professional results, but it is certainly time-consuming. If you want to save time and effort and call in the pros, reach out to Pure House Cleaning, a network of local, Seattle-area house cleaning professionals ready to make your home shine with eco-friendly cleaning products and committed effort!