
It’s that time again. You just did a deep clean of your kitchen, and you promised to keep up with it, so it remains sparkling. But how to do that? Never fear; we have the perfect kitchen cleaning checklist to make it manageable to have the clean kitchen of your dreams! Did you know that on average, in any home, 60% of the effort goes into cleaning the kitchen and kitchen area?
Skip to section
Daily Kitchen Cleaning Tasks
 When looking at daily tasks to keep your kitchen in order, you should:
- Clean countertops
- Load dishwasher
- Empty trash
- Clean appliances
- Clean up clutter
- Sink cleaning
- Fold/hang towels
What Kitchen Cleaning Should I Do Weekly?
Your weekly tasks in the kitchen require more elbow grease but will guarantee a healthier work environment when cooking and eating.
- Microwave oven cleaning
- Get rid of all spoiled and expired food
- Clean exterior of appliances
- Swap out dish towels for clean ones
- Sanitize sponges
- Sweep and mop the floor
What Monthly Tasks Should Be Covered With Kitchen Cleaning?
 Monthly kitchen tasks cover things you need to do less frequently but still cover essential tasks.
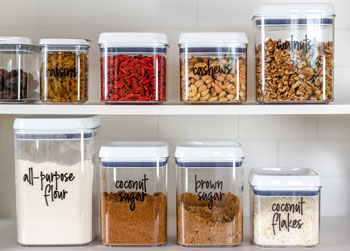
- Inventory pantry items
- Review freezer items
- Fridge cleaning
- Clean the drawers and shelves
- Dishwasher cleaning
- Clean and sanitize the trash and recycling bins
- Dust light fixtures
- Wash kitchen rugs
11 Steps For Easy Kitchen Cleaning
- Declutter
- Dishes
- Dust/wipe
- Appliances
- Cabinets and drawers
- Doors and handles
- Countertop items
- Countertop
- Sink
- Garbage can
- Floor
Step 1: Cut out the clutter
Your first step should be to look around your kitchen and remove anything that does not belong there.
Step 2: Take care of the dishes
 Is your sink filled with dishes? Are dishes on the countertop? If you have a dishwasher, load the dishes in it. If you don’t, wash the dishes in the sink. If pots or pans need to be soaked, get them soaking before you move on to anything else.
Step 3: Start at the top
You will always want to start dusting/wiping items from the top, as the dust will filter down. First, wipe the top of your cabinets, refrigerator, and ceiling lights. Then, work your way down, wiping every surface in your kitchen.
Step 4: Clean appliances
Immediately after dusting, clean the appliances. Remember to clean the interior of the microwave!
How to Do Oven Cleaning Quickly
Of all the appliances, oven cleaning tends to be the most dreaded. Follow these directions to quickly get it done!
Before oven cleaning, make sure your oven is turned off. You can make your own cleaning solution with baking soda and water. In a small bowl, mix together ½ a cup of baking soda with a few tablespoons of water until you have created a substance with a paste-like consistency.
Spread the homemade paste until it covers the interior of your oven. If you discover the paste turning brownish, this is expected. Cover the entire oven, including the glass door.
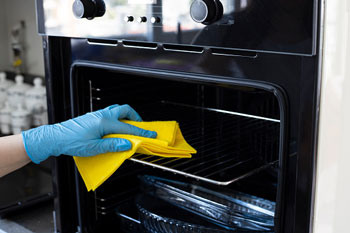 Once the paste has rested on the oven for at least 12 hours (or overnight), you can take a damp cloth and wipe down the interior as much as possible. You can utilize a spatula to scrape off any tough baking soda. Putting white vinegar in a spray bottle, spritz the entire interior of the oven to create a sparkling clean. Don’t worry about foaming when the vinegar hits the baking soda solution – completely normal!
For the last step of your oven cleaning process, take a damp cloth and wipe down one last time, making sure to remove any remaining baking soda solution. Do an extra vinegar spray to make sure. Wipe down your oven racks, and you are done!
Step 5: Remove everything from the cabinets and drawers
Once you have removed everything from the cabinets and drawers, wipe down the interior with a surface cleanser and towel. This will eliminate harmful bacteria that you might miss in your day-to-day cleaning.
How to Make DIY All-Purpose Cleanser
Ingredients:
2 cups (16 oz.) of water
1 teaspoon of baking soda
¼ teaspoon of liquid soap/dishwashing liquid
Five drops of essential oil, if desired
Spray bottle
Directions:
Combine all the ingredients in the spray bottle and shake. To use, spray directly on surfaces and wipe clean with a damp cloth, preferably microfiber.
Step 6: Wipe down cabinet doors and handles
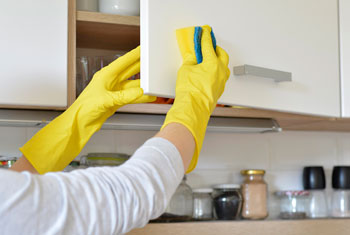 Wipe down your cabinet doors and handles with your all-purpose cleaner, making sure to use a wood-specific one, if needed. Pay particular attention to the handles to make sure that any greasy build-up is removed.
Step 7: Clean countertop items
Items often left out on the countertop, such as utensil holders, spices, cooking oils, and décor, can collect dust, food splatter, and other dirt and grime. Wipe down each item and evaluate if it can be stored in a cabinet and removed from the counter altogether.
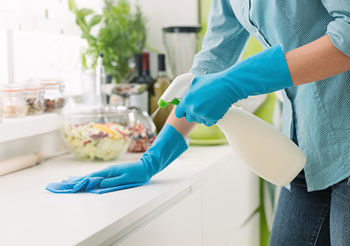
Step 8: Wipe down the countertop
It’s now time to wipe down the countertop. You can use your DIY all-purpose cleaner to tackle the mess.
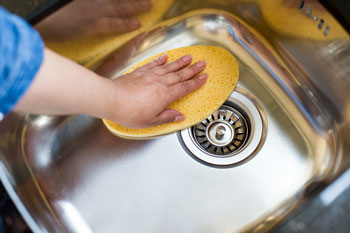
Step 9: Sink cleaning
After you clear your sink, make sure to give it a good scrub down with dish soap or your all-purpose cleaner. Include the faucet and knobs, too. And to prevent any funky scents or grime, don’t forget to clean the drain and disposal!
How to Clean a Kitchen Sink Drain
It’s not necessary to use harsh chemicals for sink cleaning. For this task, we are turning to our trusty friends, baking soda and vinegar!
1. Pull any visible bits of food out of the sink. Boil water and pour it down the kitchen sink drain.
2. Mix 1 cup water, 1 cup white vinegar, and 1 cup baking soda. You will notice it starts fizzing together when mixed, and it is vital to pour it down the drain while this chemical reaction is happening.
3. Cover the sink drain with its plug and let it sit for 15 minutes.
4. While waiting, bring more water to boil, and when you remove the kitchen plug, pour this boiling water down the drain.
The vinegar and baking soda mix act as a natural cleaner for the drain, and the boiling water will flush out all the particles that have been clogging your sink, allowing everything to flow freely again. This also helps to remove odors.
How to Clean and Freshen a Garbage Disposal
 Garbage disposals are lovely to have, but they can become smelly without proper care. This is a terrific and easy way to keep them fresh, so don’t forget this during your sink cleaning.
- Cut a lemon into wedges and drop it into your garbage disposal. Next, take a good handful of salt (preferably coarse salt) and, combined with a handful of ice, add it to the garbage disposal.
- Run cold water into your garbage disposal while it is on until all the ice has been chopped up.
This will allow the salt and ice to scrub the blades clean and help to remove all the grime while the lemon deodorizes the disposal. All you are left with is a citrus-fresh disposal!
Step 10: Clean your garbage can
It is essential to do more than empty your kitchen garbage can, as smells can quickly accumulate and become overwhelming. Additionally, a clean garbage can keeps pests away. Once you empty the trash can, vacuum the can and wipe it out using your DIY all-purpose spray. Next, do the same with your recycling bin.
Step 11: Clean the floor by sweeping, vacuuming, and mopping
Sweep your floor first, removing any larger crumbs or dirt that is present. Once you have completed that, vacuum to remove any dirt, dust, pet hair, or other particles. Finally, mop the floor to put the finishing touch on your clean kitchen.
We all love a sparkling kitchen, but if you need more time for kitchen cleaning to keep it up to your standards, it’s time to call the professionals. Pure House Cleaning, a network of local, Seattle-area house cleaning professionals, is ready to help make your home shine with eco-friendly cleaning products and dedicated effort!